 mecasa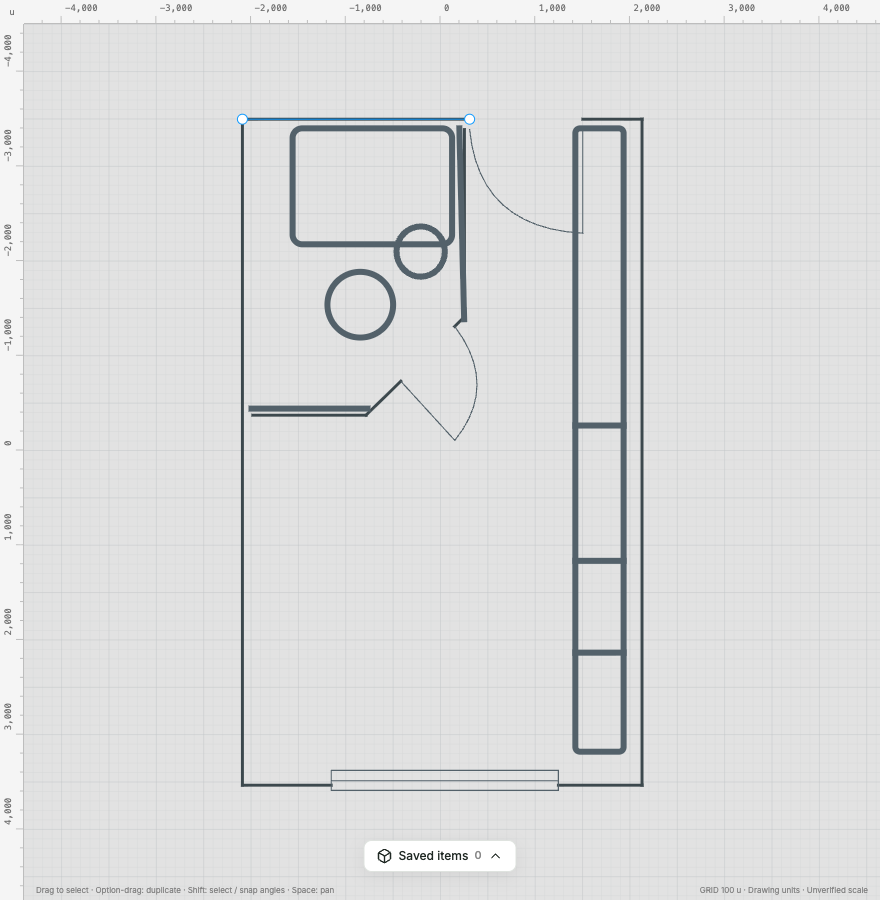
1. Choose a drawing you can check
A floor-plan image is useful evidence of what a drawing shows. It may still omit dimensions, simplify a wall, or use an assumed scale. Keep the original beside your working draft so you can compare openings, partitions and fixtures instead of trusting a clean-looking trace.
For this walkthrough, we uploaded Mecasa’s public capsule-plan SVG. It is a simplified redrawing based on Mliu92’s Nakagin floor plan, rather than an architect’s measured survey. Its physical scale is unverified. You can use the same file to follow the steps, or use a plan you have permission to upload.
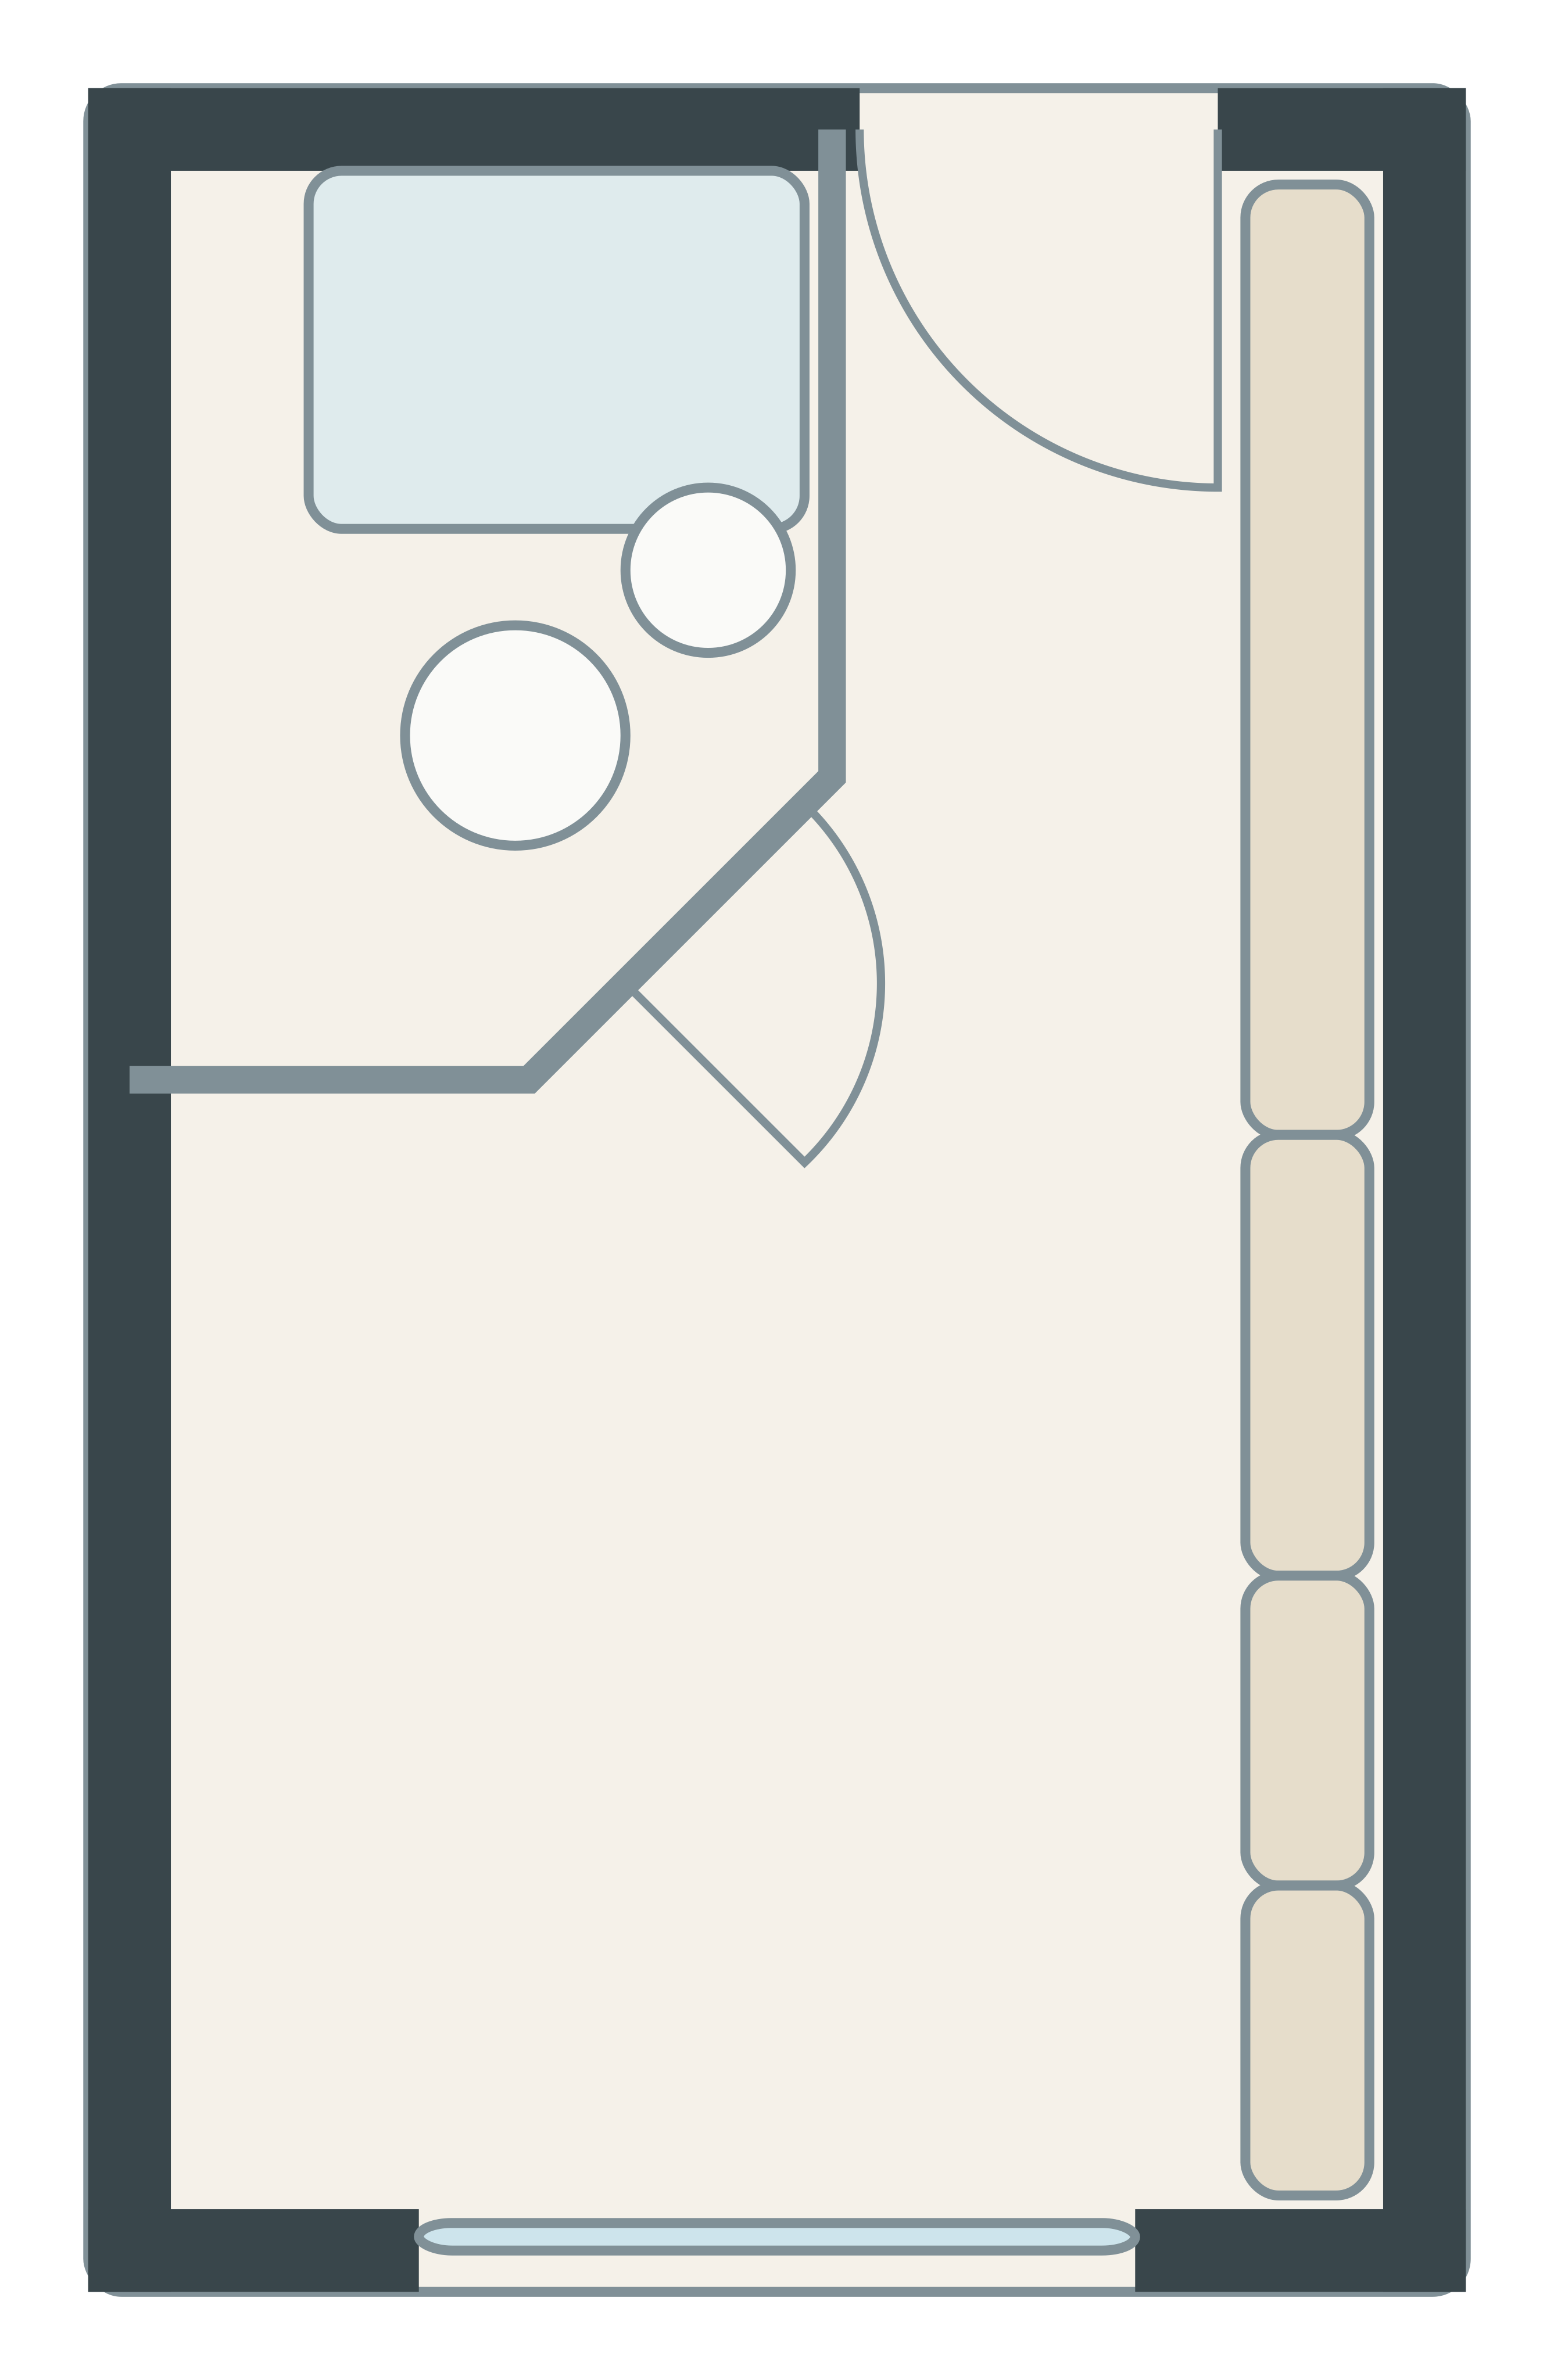

The example demonstrates editing a drawing. It does not demonstrate a measured room boundary or a verified furniture arrangement.
2. Start a canvas and attach the plan
Open Mecasa and sign in to work on your own canvas. Use the canvas menu’s New canvas action when you want to keep an existing project separate. Give the new canvas a recognizable name.
In the opening chat, select Attach materials and choose the drawing. Our SVG appeared as an image attachment before we sent the request. Check that the right file is attached; remove an accidental attachment before continuing.
Keep source links and measurement notes with the plan. In our test, the uploaded file also appeared under Canvas menu → Sources, which describes saved evidence as material to review, rather than verification of measurements.
3. Ask for an editable draft
Tell Mecasa what to trace and what remains unknown. Our request asked for the architectural lines of the attached public drawing, retained its source and license, and explicitly excluded inferred dimensions and furniture. A request for the same task can be written like this:
Trace the architectural lines of the attached floor plan into an editable vector draft. Keep physical dimensions and scale unknown. Preserve the source attribution. Do not infer measurements or add furniture.
Send the request and watch its progress. In this run, Mecasa read the material, traced the visible floor plan and reviewed built-ins and fixtures before the result appeared. Allow the current operation to finish before starting another conversion. Check the usage information shown by your account; the walkthrough does not promise a particular price or processing time.
The test produced 22 vector items, including walls, doors, a window and provisional fixture shapes. Some items were labeled unconfirmed. Your result may differ. Compare the draft with the uploaded source, especially door swings, wall junctions and anything the model may have mistaken for furniture.
4. Select a vector and make a small edit
Select an item in the layer sidebar. We chose Wall 1, which opened the Edit plan panel. It showed X, Y, Width, Height and Rotation, along with Not to scale and Drawing coordinates, not measured units.
For a reversible test, we changed the wall’s X field from 0 to 20 and moved focus out of the field. The inspector displayed the new value. This changed a drawing coordinate; it was not a 20 mm movement in a measured room. The canvas continued to show Drawing units · Unverified scale.
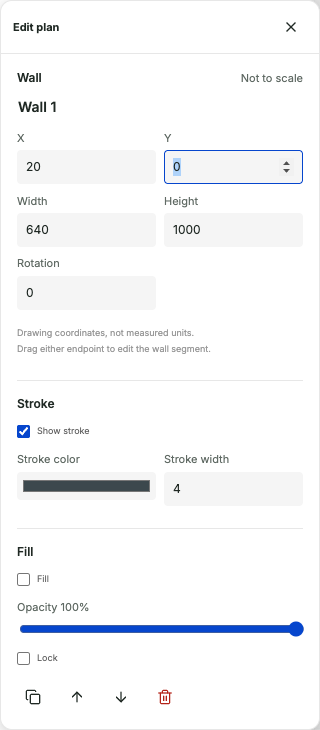
Use a small edit to learn the controls before making a large change. The wall inspector also offers stroke, fill, opacity and locking controls. A more readable drawing can make review easier, but appearance changes do not establish its scale or confirm a product footprint.
5. Undo the test and review the draft
Open the canvas menu and choose Undo. Select the same item again to check the result. In our test, Wall 1’s X field returned to 0. The original source remained available for comparison.
Work through the plan one feature at a time. Keep uncertain labels marked as uncertain; a model’s guess that a shape is a sink, shower or built-in cabinet needs comparison with the source. Correcting a drawn line does not verify the actual wall’s position.
6. Bring measurements before planning a purchase
For a real room, collect measured inside-wall lengths, opening positions and fixed obstructions. Record physical room and product geometry in millimetres, with its source. A floor-area total, photograph or generated image cannot fill in missing wall lengths.
Keep the editable trace separate from those measurements until the draft has been explicitly reviewed against them. Do not turn a vector width into a room width just because a field contains a number. Unknown dimensions stay unknown, and researched or AI-drafted arrangements remain unverified.
When you have the measurements and exact product specifications, follow the studio-layout guide’s furniture review to compare footprints, door access and everyday routes. This walkthrough makes the plan editable; furniture fit still requires reviewed room and product dimensions.
Example source: Nakagin floor plan by Mliu92 (2023), adapted and simplified by Mecasa under CC BY-SA 4.0. Screenshots show an AI trace of that adaptation and a temporary coordinate edit, tested on October 13, 2026. Neither the source’s assumed scale nor the trace establishes measured architectural dimensions. The adapted plan shown in the screenshots retains that license.
Bring your floor plan to Mecasa →
← Back to the journal